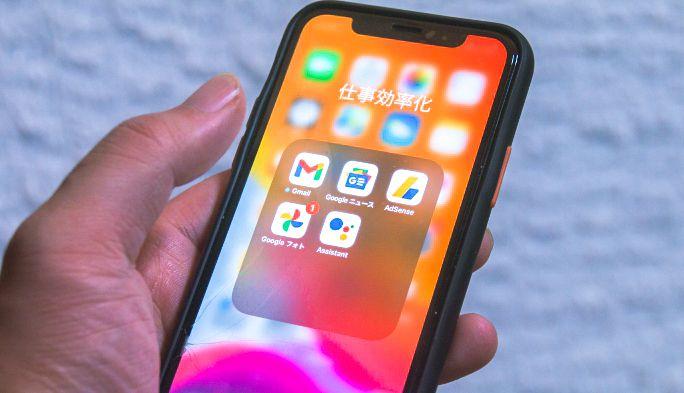
Many people are using "Gmail", but are they using various detailed functions? Gmail also has many useful features for private and business use. So, let's introduce some Gmail functions that can be used on smartphones.
- 【table of contents】
Send cancellation function
Immediately after sending an email, you often notice that the other person's name has the wrong Chinese character, or you are worried that the date is correct. Therefore, in Gmail, you can cancel the transmission immediately after sending.
"Sent" notification that appears at the bottom of the screen immediately after sending. If you tap "Undo" on the right side, you can start over from the draft without being sent. While this notification is issued, it is not actually sent and is waiting to be sent, but in a few seconds the notification automatically disappears and the transmission is performed. If you want to cancel, you need to tap immediately.
Also, even if you perform other operations while the notification is being sent, the notification will disappear and be sent. The Android / iOS Gmail app can't change this number of seconds, but the web version of Gmail allows you to set the display time for this notification in 5-30 seconds. If you're using the web version of Gmail for business, remember.
"Snooze" function that hides once and displays it at a specified time
Some kind of response such as e-mail is required, but it may not be possible to reply immediately. Or you may want to be notified again later so that you don't forget the sale information that is ahead of the date. In such cases, the "snooze" function is convenient. It's a feature that temporarily hides certain emails and redisplays them at the top of your inbox at a specified date and time.
For the setting method, with the mail open, select the [⁝] icon ▶ [Snooze] ▶ redisplay date and time in the upper right.
By default, options such as [Slightly later], [Tomorrow], and [This weekend] are displayed, but you can set them freely by selecting [Select date and time].
Emails with "Snooze" set will be moved to the "Snooze" folder, and will be displayed again at the top of the inbox at the specified time.
To cancel, open the mail from the snooze folder and click the [⁝] icon ▶ [Cancel snooze].
Set automatic reply when you are away
If you're on vacation or in a place where you can't connect to the Internet and can't reply to Gmail right away, it's useful to set up an automatic reply when you're away. For emails received between midnight on the start date and 11:59 pm on the end date, the email with the set contents will be automatically replied as an out-of-office notification.
Even if you receive multiple emails from the same person during the set period, the out-of-office notification will be sent only once. However, if you receive an email from the same person more than 4 days after sending the out-of-office notification, it will be sent again if it is still within the set period.
Select [Settings] from the menu displayed from the [≡] icon on the upper left, and tap the target account.
From the setting items, select [Notification of absence] to enable the setting. Enter the period, subject and message and tap [Done] to finish. If you check [Send to contacts only], you will receive an out-of-office notification only when you receive an email from the person registered as a contact.
"Thread display" on / off method
In Gmail, the emails you are exchanging, such as replies to the emails you sent, are organized in the form of threads, and the sent emails and replied emails are displayed together. It's a convenient function that makes it easy to follow the topic, but when the exchange becomes long, it may be difficult to understand at a glance, such as when it was first received. In such a case, you can disable the thread display and display the mail individually.
To disable the thread display, which is enabled by default, tap [Settings] in the menu displayed from the [≡] icon on the upper left.
Select the account you want to set up and uncheck [Thread View].
"Signature" settings
If you use the signature function added to the end of the email, you can write your own email address and contact information at the end of the email. In the web version of Gmail, you can also set a signature using an image, but in the Gmail app, you can set only a simple signature with only text.
Select [Settings] from the menu displayed from the [≡] icon on the upper left. Tap the target account.
Tap [Mobile Signature] and enter your signature. Tap [OK] to set.
How to switch to another account with multiple accounts
In addition to your personal Gmail account, you may also have a work Gmail account. Gmail allows you to switch between those multiple accounts. When adding an account to use with the "Gmail" app, select [Add another account] from the profile icon in the upper right.
If you have already added it, tap the profile icon to display a list of other accounts. Select the one you want to switch to and it will switch to that account.
Convenient "label" for work / private use
If you have only one Gmail account and you use it for both work and private use, you can label your email so that you can tell at a glance whether it's a work email or a private email. Multiple labels can be attached to one email, and each label can be displayed.
With the mail open, tap the [⁝] icon in the upper right and select [Change Label] from the displayed menu. Select the label you want to set and tap [OK].
The label creation itself cannot be done with the Gmail app on Android or iOS, but must be done from the web version of Gmail. Here, I will introduce how to create it with a smartphone browser, but there are a few more steps than operating it with a PC.
Access Gmail with a browser and tap [Desktop] at the bottom of the menu displayed from the [≡] icon on the upper left. On the next screen, tap [Use latest Gmail] to switch to the PC version screen.
When the PC version screen is displayed, tap [More] from the menu on the left. Scroll the menu and tap [Create new label].
Enter the label name and tap [Create].
Benefits and methods of "archive"
If you leave the read emails as they are, your inbox will be filled with emails. In such cases, it's a good idea to "archive" the email. Emails are not deleted and are hidden from your inbox. This is useful when organizing emails that have been completed. Even if you normally hide it, you can browse the archived emails by tapping [All Emails] from the menu on the upper left.
As for the archiving method, by default, swipe the mail you want to archive on the list display screen to the left or right. Alternatively, with the email open, tap the archive icon that appears at the top of the screen.
"Star" function to mark important emails
The star function is a function that makes it easier to find later by adding a star mark to important emails. You can also view only starred emails, so it's a good idea to keep this in mind as one of the default labeling features.
With the list display screen or mail open, tap the [★] on the right side of the subject to give a star, and tap it again to cancel it.
Starred emails can be listed by tapping [Starred] from the menu.
"Filter" that automatically sorts emails by genre
Labels and stars can be added manually, but if you use the filter function, you can set certain conditions and automatically add labels and stars when you receive them. Automatic transfer, deletion, archiving, etc. are also possible. Filters cannot be set in the Gmail app, so let's do it in the web version of Gmail. When using a smartphone browser, display the PC version of Gmail screen and operate according to the procedure explained in the item of label creation.
Tap [▼] on the right side of [Search Email] to display the search condition screen. Specify the condition you want to sort. If you want to label the email from a specific sender, enter the email address of the other party in the From field and tap [Create Filter].
The operation when the conditions are met is displayed, so check [Add Label] and select the label. If you want to label emails that have already been received, check [Apply filter to matching threads with ○] at the bottom. Finally, tap [Create Filter] to add the set label.
If you check [Skip Inbox] on the previous screen, it will be automatically archived when you receive it.
If you want to edit / delete the set filter, tap [Show all settings] in the menu displayed from the gear icon on the upper right of the web version of Gmail.
Select the Filters and Blocked Addresses tab and then apply the following filters to all incoming emails. ], Select the filter displayed, and tap [Edit] or [Delete].
"Junk E-mail Prevention" function
Gmail uses an automatic filtering function to automatically sort some junk mail to the [Junk Mail] folder, but it can also block specific senders and sort mail to junk mail.
With the email of the sender you want to block open, display the menu from the [⁝] icon on the right side of the subject and tap [Block "○○"]. It is automatically sorted to [Junk E-mail].
If you accidentally block it, you can unblock it by tapping [Unblock Sender] displayed on the screen.
How to report non-spam mail
If a particular email is automatically sorted into junk email, reporting that it is not junk email will cause the email from that sender to remain in your inbox as usual.
When you open the target e-mail from the [Junk E-mail] folder, the reason why it was largely sorted into junk e-mail is displayed. Tap [Report not junk mail] below it.
Make Gmail more convenient
Gmail is used by many people every day, but there are many useful functions that are not surprisingly known. It's an app that can be used without problems with only basic functions, but it will be more convenient if you master the functions introduced here. Please refer to it.




![Advantages of "Gravio" that can implement face / person recognition AI with no code [Archive distribution now]](https://website-google-hk.oss-cn-hongkong.aliyuncs.com/drawing/article_results_6/2022/2/25/98ceaf1a66144152b81298720929e8e7.jpeg)